BLOGSPOT TUTORIAL
1. The first step in making a BLOGSPOT is to make an account on GMAIL J
Fill up the Google form in order to
have an account.
2. If you’re done making an account, open the BLOGGER site J
Sign in with your G mail account to create a Blog Spot.
3. Click the New Blog in creating a Blog Spot.
4. In creating a blog, you can put a Title, Address and also a template
for the design of your chosen template.

The OVERVIEW, its shows that you have
already created a Blog Spot.
5. Click the Layout tab, and this will appear.
This is my Blog spot page; there are no Posts and no Gadget yet.
6. Add a
Gadget by clicking the Add a
Gadget bar in the Layout field.
And this will appear.
7. Click the More Gadgets tab and we
first add the calendar.
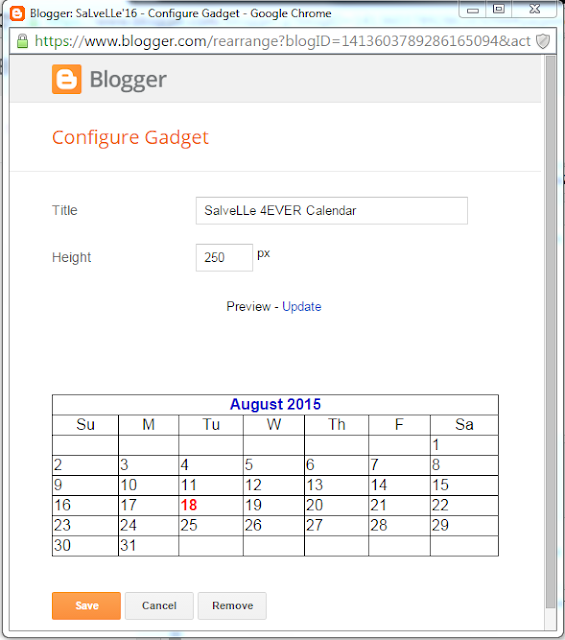
8. Configure the Calendar Gadget and
Save.
9. After you configure the Calendar,
in your layout the Calendar entitled “SalveLLe 4EVER Calendar” will be added to
your layout.
10. The calendar gadget is
successfully added to your Blog Spot.
11. We will add also a Clock gadget
in the BlogSpot. We will do the same process in adding a clock just like the
process of adding a calendar.
12. You can choose what clock design
you want to add to your Blog Spot.
13. Again, configure your clock
gadget then save.
14. The clock entitled
“Oras ng Pagmamahal” is now added to your BlogSpot Layout.
15.The clock gadget
is successfully added in your Blog Spot.
16. We will add Link List in your Blog Spot it found in a Basics category of your gadget. The Link list displays a
collection of your favorite sites, blogs, or web pages for your visitors.
17. After clicking the Link list,
configure the Link list, you may put your title of your links. The important
thing in adding a link is that you should put the correct Uniform Resource
Locator of the Site. After you configure the Link list just click the Save.
18.The Link List entitled “Classmates cu” is now added to your Layout.
19. Your Link List is successfully
added to your Blog Spot. You can visit now
the sites of your classmates.
20. For the last part, we will add
some post to your Blog Spot. In adding a Post just click the New Post.
21. After clicking the New Post a
blank post will appear, you can add here an image, a files, document and etc.
We will post an image to the Blog Spot. Click the Image Icon.
22. After clicking the image icon this will result, you can now select whatever image you want to upload in your Blog Spot. After you select an image click the Add Selected.
23. Now you already added an image, you can make a caption about the image you post. The important thing in Post is that you should click the Publish in order to save it to your Blog Spot.
24. And now you have now a Post on
your Blog Spot. And that’s the end of the tutorial of the Blog spot.


